
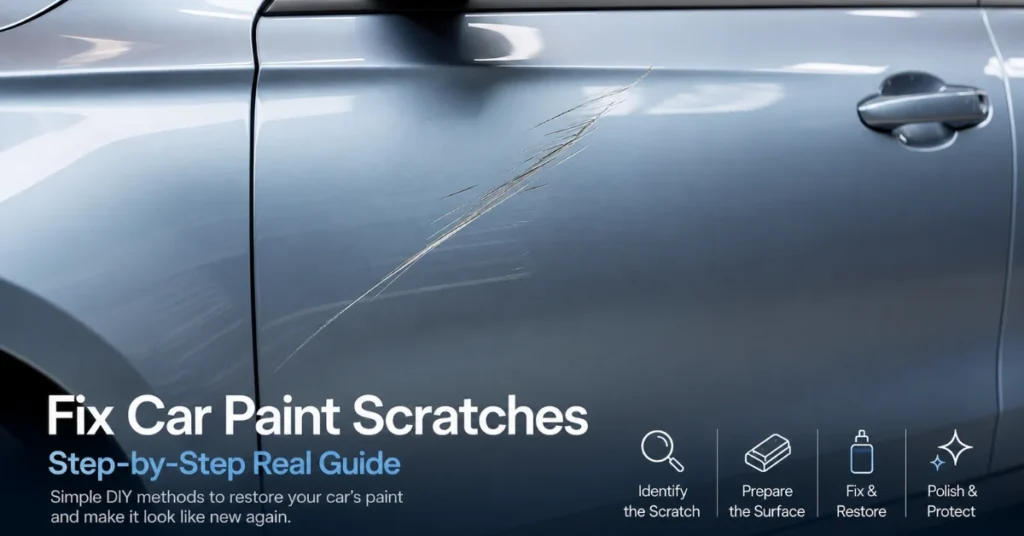
Your car picked up a new mark somewhere between the grocery store and home, and now you’re standing in the driveway running a finger over it. Figuring out how to fix scratches on car paint starts with one simple question: how deep does it actually go? That single detail decides whether you’ll spend twenty minutes with a microfiber cloth or an entire Saturday with sandpaper and touch-up paint.
This guide walks through every stage of the process, from diagnosing the damage correctly to choosing the right materials, so you don’t end up making a small problem bigger.
Why Learning How to Fix Scratches on Car Paint Actually Matters
A scratch isn’t just cosmetic. Once a mark cuts through the clear coat, the layers underneath lose their protection against moisture, road salt, and UV exposure. Modern automobile paint is applied in several layers, with a total thickness of around 100 micrometers, and a clearcoat layer that’s meant to withstand daily wear. When that outer shield gets breached, oxidation can set in faster than most drivers expect.
There’s also a resale angle. Buyers notice bodywork condition immediately, and a car covered in neglected marks tends to get priced down before anyone even opens the hood. Anyone who has sold a used vehicle privately knows how quickly a buyer’s tone shifts once they spot a bad scratch under the lot lights.
Step One: Identify What Type of Scratch You’re Dealing With
Not every mark needs the same treatment, and guessing wrong wastes time and product. Run a fingernail gently across the line.
- If your nail glides over smoothly, the damage is likely confined to the clear coat.
- If your nail catches slightly, the scratch has probably reached the base color layer.
- If you see white, gray, or bare metal at the bottom, it’s gone through to primer or the metal itself.
This quick test is the fastest way to sort a light buff job from a repair that needs paint. Skipping it is the single biggest reason DIY attempts go sideways.
Scratch Type Quick Reference
| Scratch Type | Fingernail Test | DIY Difficulty | Typical Fix Method |
|---|---|---|---|
| Clear coat only | Nail glides over smoothly | Easy | Compound and polish |
| Base coat exposed | Nail catches slightly, color visible | Moderate | Touch-up paint plus clear coat |
| Primer or metal exposed | Nail catches hard, white or metallic showing | Hard, professional recommended | Rust primer, paint, and clear coat |
Clear coat scratches sit on the outermost layer and usually don’t catch a fingernail. They’re the easiest category to handle at home and rarely require any color matching.
Base coat scratches mean the color layer is exposed, and the fix gets more involved. You’ll need touch-up paint that matches your exact factory code, not a generic bottle from a bargain bin.
Primer or metal scratches are the ones that turn into rust if ignored. Bare metal exposed to air and moisture starts corroding within days in humid climates, so speed matters here more than perfection.
Finding Your Exact Paint Code Before You Buy Anything
This step gets skipped constantly, and it’s probably the reason so many touch-up jobs look slightly off. Every car has a paint code, and it isn’t the same as the color name on the window sticker. Check the driver’s door jamb sticker, the VIN plate under the hood, or the glovebox for a small plate listing a paint code, usually a short combination of letters and numbers.
Enter that exact code, not the car’s color name, when ordering touch-up paint or clear coat. Two “midnight blue” cars from different model years can carry different codes, and using the wrong one is how a repair ends up a shade off under sunlight even after a careful application.
How to Fix Scratches on Car Surfaces: The Clear Coat Method
For the shallow stuff, here’s the process that actually works.
- Wash and dry the panel. Dirt trapped under a polishing pad will grind tiny new scratches into the surface, so start clean.
- Apply a rubbing compound. Work it into the mark with a microfiber applicator using small circular motions, and don’t press harder than you need to.
- Check your progress often. Wipe the area and inspect under direct light every few passes. Over-polishing thins the clear coat and shortens its lifespan.
- Finish with a polish and wax. This restores gloss and adds a thin protective barrier over the repaired spot.
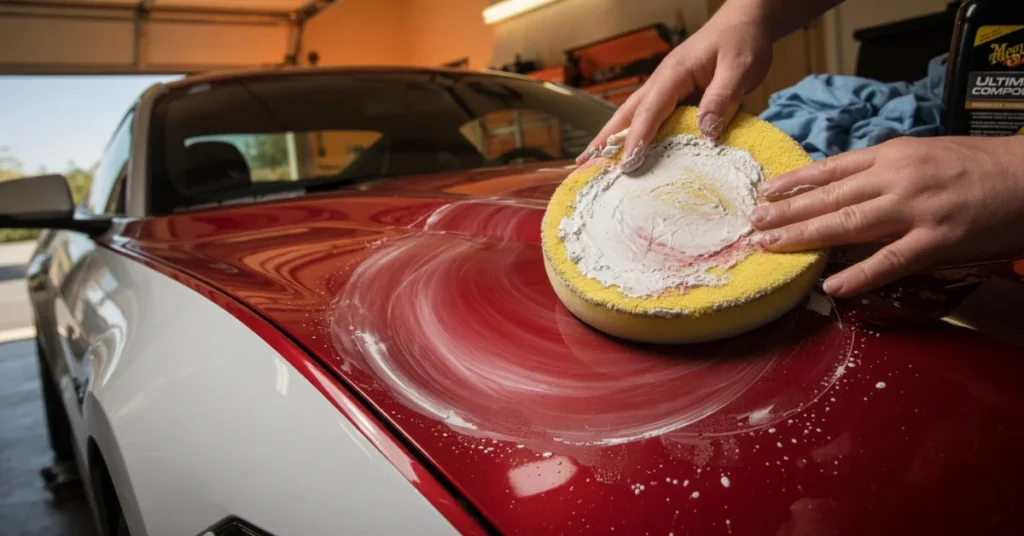
Hand application gives more control for a first attempt, while a dual-action polisher speeds things up once you’ve built some confidence. Either approach works well when the pressure stays light and consistent.
Fixing Deeper Scratches That Reach the Paint or Primer
This is where the process changes completely, and rushing it almost always shows.
Start by cleaning any loose paint or rust out of the groove with fine sandpaper, working from a coarser grit toward a finer one as the surface smooths out. Apply touch-up paint matched to your vehicle’s factory paint code in thin layers, letting each one dry before adding the next. Building up too much at once creates a raised bump that catches light differently than the surrounding panel.
Once the color layer is level, seal it with a clear coat product and let it cure fully before polishing. Rushing the cure time is the most common reason a home repair ends up looking patchy months later.
For scratches that reached bare metal, treat the exposed area with a rust-inhibiting primer before painting anything. Skipping this step is how a five-dollar problem becomes a five-hundred-dollar one.
Why temperature and humidity change your results
Clear coat and touch-up paint don’t cure the same way in every garage. On a hot, dry afternoon, spray or brush-on clear coat can flash off too quickly, leaving a slightly matte or uneven patch instead of a glossy finish. In humid conditions, the opposite problem shows up: the coating stays tacky longer, and dust settles into it before it hardens.
The safest window sits in a moderate, dry environment, away from direct sun and away from a damp garage right after rain. If you can’t control the space, at least time the repair for a mild part of the day, and cover the area if wind is kicking up debris nearby.
Repairing Scratches on Wrapped or Matte Finish Vehicles
Standard compound-and-polish techniques are built for gloss clear coat, and they don’t translate to a vinyl wrap or a factory matte finish. Rubbing compound will dull a matte surface permanently, since the whole point of that finish is a texture that reflects light differently than gloss paint.
On a wrap, a scratch usually means the vinyl itself is cut or lifted, not the paint underneath. Small nicks can sometimes be sealed with a specialized vinyl-safe edge sealer, but anything beyond a hairline mark typically needs a patch of matching wrap material cut and heat-applied by someone experienced with vinyl work. Trying to buff a wrap scratch out the way you would a clear coat scratch usually leaves a visible dull halo around the repair that’s harder to fix than the original mark.
A Note for Aluminum-Bodied and EV Panels
Aluminum body panels, increasingly common on electric vehicles and some newer trucks, behave differently under sandpaper than steel does. Aluminum is softer, and standard steel prep techniques can gouge it faster than expected if you’re not careful with grit choice and pressure.
Owners of aluminum-paneled EVs should stick to finer grits from the start rather than starting coarse, and should confirm any filler or primer product is explicitly rated for aluminum substrates. A product formulated for steel bodywork can bond poorly to aluminum and lift within months.
What Tools and Materials You’ll Actually Need
Once you know how to fix scratches on car paint at each depth, the next step is gathering the right materials — a basic kit covers most jobs without overspending. A basic kit covers most jobs without overspending:
- Microfiber towels and applicator pads
- Rubbing or cutting compound
- Fine-grit sandpaper (start around 2000–3000 grit for clear coat work)
- Touch-up paint matched to your factory color code
- Clear coat spray or pen
- Painter’s tape for masking
Cheap sandpaper and off-brand compounds tend to leave hazing that a proper product wouldn’t. Spending slightly more upfront on the compound and tape saves a redo later.
Common DIY Products That Don’t Actually Work
A few home remedies get repeated constantly online, and it’s worth being honest about their limits.
- Toothpaste has mild abrasives that can very slightly dull the look of the lightest hairline marks, but it isn’t formulated for automotive clear coat and won’t touch anything that’s caught a fingernail.
- WD-40 can temporarily mask a scratch by filling it with oil, which looks like an improvement for a few hours until it evaporates and the mark reappears.
- Magic erasers are a mild abrasive similar to very fine sandpaper. They can help on the lightest surface scuffs but carry real risk of thinning clear coat if used too aggressively or too often on the same spot.
- Clear nail polish is sometimes suggested as a gap filler for chips, but it yellows over time and doesn’t bond the way an automotive-grade clear coat does.
None of these replace a proper compound-and-clear-coat process for anything beyond the shallowest surface scuff.
DIY vs. Professional Repair: What Actually Makes Sense
Not every scratch belongs in your garage. Deep gouges that span multiple panels, damage close to trim or sensors, or marks where you’re simply unsure of the depth are all better handled by a body shop. Trained technicians blend paint across an entire panel so the repair disappears rather than sitting as a slightly-off patch.
Professional pricing scales with severity. A surface buff at a shop tends to sit toward the lower end of the price range, while a repair needing sanding, primer, base coat, and clear coat across a full panel climbs considerably higher, especially with modern metallic and pearl finishes that are hard to color-match by eye. DIY kits, by contrast, usually run a fraction of that cost but carry more risk of a visible mismatch if the color isn’t blended correctly.
DIY vs. Professional at a Glance
| Factor | DIY Repair | Professional Repair |
|---|---|---|
| Relative cost | Low | Low to high, scales with damage depth |
| Time required | A few hours to a full day | Same-day to several days |
| Skill level needed | Beginner to intermediate | Trained technician |
| Best suited for | Light clear coat scratches on flat panels | Deep, multi-panel, or curved-surface damage |
| Color match risk | Higher, especially on metallic or pearl paint | Low, professionally blended |
| Warranty | None | Often included |
Anyone weighing an insurance claim should also check their deductible first. Small marks frequently cost less to repair out of pocket than the deductible itself, and filing anyway can nudge future premiums upward.
What the Research Shows
Detailing professionals and body shop technicians consistently point to one pattern: most DIY failures come from skipping the diagnostic step, not from using the wrong product. Owners who correctly identify scratch depth before starting tend to see far better results than those who jump straight to a polish or touch-up pen. Because clear coat forms a glossy, transparent protective layer over the base color, misjudging its thickness is one of the most repeated errors in home repairs.
Industry pricing data through 2026 also shows a widening gap between basic buff-outs and full panel resprays, driven largely by the rising cost of matching modern multi-layer paint systems. That gap is exactly why the fingernail test at the start of this process matters so much. Getting the diagnosis right the first time avoids paying twice.
How Long to Wait Before Washing or Waxing After a Repair
A freshly repaired panel needs time before it can handle normal car care again. Avoid automatic car washes, pressure washers aimed directly at the repair, and heavy waxing for at least one to two weeks after applying touch-up paint or clear coat, longer in cooler or more humid conditions.
Light hand washing with a soft cloth and plenty of water is generally fine sooner, but anything abrasive near the repair site before it’s fully cured can undo the work. If you’re unsure whether the area has hardened enough, a gentle fingernail test in an inconspicuous spot nearby, never directly on the repair, can give you a rough sense of cure progress.
Preventing New Scratches Before They Happen
A little prevention goes further than any repair kit. Wash your car with the two-bucket method to avoid dragging grit across the paint, and skip automatic car washes with worn brushes when you can. Parking away from shopping cart corrals and tight spaces cuts down on door-ding-related marks. A ceramic coating or paint protection film adds a sacrificial layer that takes the hit instead of your factory paint, worth considering on a newer vehicle you plan to keep for years. Knowing how to fix scratches on car paint is useful, but avoiding the need in the first place saves even more time.
Who Should Attempt This Repair Themselves
First-time DIYers with a single light clear coat scratch on a flat panel are in good shape to try this at home. Anyone dealing with a curved panel, a scratch near a body line, or a metallic finish should think harder about a professional quote, since blending gets noticeably trickier on those surfaces. Fleet owners and anyone managing multiple vehicles often find it’s more efficient to batch small touch-ups seasonally rather than reacting to every mark individually. Whatever category you fall into, learning how to fix scratches on car paint before you need to is far less stressful than researching it with a fresh mark staring back at you.
Conclusion
Knowing how to fix scratches on car paint comes down to one habit: diagnose before you act. A light clear coat mark is a weekend fix with basic tools. Anything deeper, or anything on a wrap, matte finish, or aluminum panel, deserves patience, the right materials, and sometimes a call to a body shop. Either way, catching damage early keeps a small cosmetic issue from turning into a rust problem down the road.
FAQs
Is it possible to learn how to fix scratches on car paint without professional tools?
It can mildly reduce the appearance of very light surface marks because of its mild abrasiveness, but it isn’t a substitute for a proper rubbing compound and won’t do anything for scratches that reach the paint layer.
How much does it typically cost to fix a scratch on a car?
Costs vary widely by depth and location, ranging from a low-cost basic DIY kit up to a much larger sum for a professional panel repaint, depending on severity and paint type. Getting a local shop quote is the most reliable way to know your real number.
Will insurance cover a scratch repair?
Comprehensive coverage often applies to vandalism or weather-related scratches, but check your deductible first, since many minor repairs cost less out of pocket than filing a claim would.
How long does touch-up paint need to cure before polishing?
Most manufacturers recommend waiting several days to a couple of weeks before polishing over fresh touch-up paint, though exact timing depends on the product and climate conditions.
Can a deep scratch cause rust if I don’t fix it right away?
Yes. Once bare metal is exposed, moisture and oxygen start the corrosion process quickly, so it’s worth addressing deep scratches sooner rather than later.
Does the clear coat method work on a wrapped or matte car?
No. Compound and polish are made for gloss clear coat and will dull or damage a wrap or matte finish. Those need a vinyl-safe sealer for small nicks or a patch repair for anything larger.