
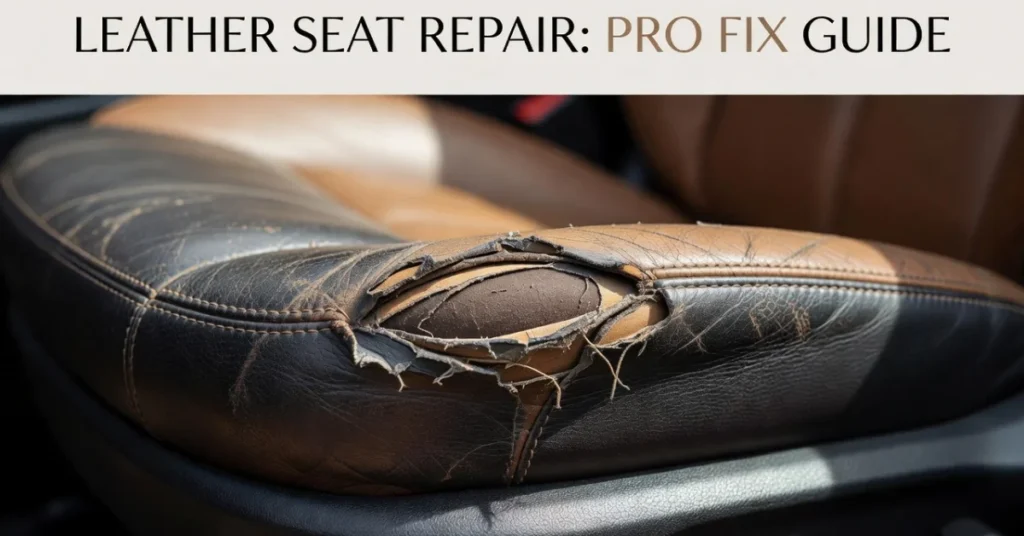
You climb into the driver’s seat, glance down, and there it is: a jagged split in the leather right where your hip sits every single day. Figuring out how to fix ripped leather car seat damage is one of those jobs that looks intimidating until you actually break it down into steps, and most drivers can handle the small-to-medium tears themselves in an afternoon.
That rip didn’t show up overnight. Leather stretches and flexes every time someone sits down, and over months that constant motion works on weak spots until the surface finally gives. A key in a back pocket, a dog’s claw catching the bolster, or just years of sun exposure drying out the hide all lead to the same result. The good news is that leather is far more repairable than most people assume, and a small tear caught early rarely requires a trip to an upholstery shop.
Why Leather Car Seats Rip in the First Place
Leather isn’t one uniform material. Car seats usually combine a genuine hide on the flat seating surfaces with a more flexible, often vinyl-blended material on the bolsters and sides, since those areas bend the most during entry and exit.
That bolster area, right where you swing your legs in, takes the brunt of the damage. Seatbelt buckles scrape against it thousands of times a year. So do keys, zippers, and anyone who drives for a living and slides across that seam dozens of times a shift.
UV exposure plays its own quiet role. Sunlight through the windshield dries out the natural oils in leather, and dry leather cracks the way old paint does. A tiny crack under tension eventually turns into a rip.
Anyone who has owned a leather-interior car for more than five years knows the pattern. A small crack shows up first near a seam, gets ignored because it’s “not that bad,” and then one hard sit-down turns it into a two-inch tear.
Quick Check: Is It Real Leather or Vinyl?
Before buying any product, it helps to know exactly what you’re working with, since genuine leather and vinyl/bonded leather respond differently to fillers and dyes.
- Pinch test. Genuine leather wrinkles unevenly when pinched, showing natural grain variation. Vinyl tends to fold in smoother, more uniform creases.
- Smell test. Real hide has a faint, organic leather smell. Vinyl usually smells more like plastic or has almost no scent at all.
- Check the underside. Lift the seat cushion where possible. A cloth or felt backing usually means genuine leather. A smooth, plasticky backing points to vinyl or bonded leather.
Getting this right matters. Using a filler formulated for genuine hide on a vinyl seat, or the reverse, is one of the quieter reasons a repair looks fine on day one and peels within a week.
How to Fix a Ripped Leather Car Seat With a Repair Kit
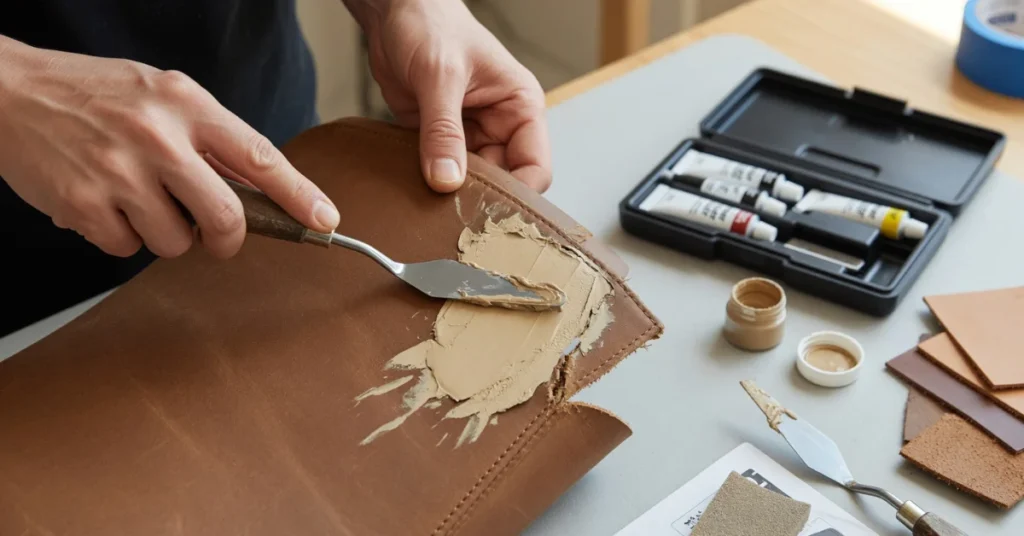
For most drivers, this is where learning how to fix ripped leather car seat tears actually starts and ends. A patch-and-fill kit handles the vast majority of tears under three inches, and the process, while fiddly, doesn’t demand any special skill.
What You’ll Need
- Leather repair kit (cleaner, backing fabric, filler compound, color-matched dye, applicator)
- Scissors or a sharp utility knife
- A palette knife or thin plastic spatula
- Fine-grit sandpaper (400–600 grit)
- A hair dryer or small heat gun
A Heated Seat Warning Worth Knowing
Before reaching for a heat gun, check whether the seat has heating elements built in, which is common on mid-range and higher trims. A thin heating wire grid usually runs just under the leather surface, and aggressive sanding or a heat gun held too close can melt or sever it. A hair dryer on a low setting is the safer choice for curing filler on any seat with heated-seat function, and cutting or trimming near the tear should stay shallow rather than deep.
Step-by-Step Process
Clean the area first. Wipe down the torn section and the surrounding leather with the cleaner included in the kit, or a pH-neutral soap and water. Skip this step and the filler won’t bond properly, no matter how well you apply it later.
Trim the loose edges. Frayed or curled leather around the tear needs a clean edge to work with. Snip away anything that’s already lifting or stretched thin, staying shallow if the seat is heated.
Insert the backing fabric. Slide the adhesive-backed cloth included in most kits underneath the tear, centered so it extends about half an inch past each edge. This becomes the foundation the filler grips onto.
Build up the filler in thin layers. Apply the compound with the spatula, working it into the tear rather than piling it on top. One thick coat cracks later. Three or four thin ones, each dried before the next, hold up far better.
Sand it level. Once the final layer cures, lightly sand until the repair sits flush with the surrounding leather. Wipe away the dust before moving on.
Match the color and seal it. Apply the dye in light, even coats, letting each dry fully. Finish with the sealant provided, and avoid sitting on the repaired spot for at least a full day.
How to Fix a Ripped Leather Car Seat Without a Kit
Not everyone has a kit sitting in the garage, and sometimes a tear happens the night before a road trip. Fixing a ripped leather car seat without buying anything specialized still works for smaller splits, though it’s a temporary measure rather than a lasting one.
A denim or leather patch, cut slightly larger than the tear, can be tucked underneath the opening and glued in place with a strong fabric adhesive. It won’t be invisible, but it stops the tear from spreading and buys time until a proper kit repair happens.
Here’s a trick most kit instructions never mention: check the underside of the rear seat cushion, or wherever the upholstery attaches to the frame, for spare factory leather. Manufacturers often leave a few inches of extra hide tucked under attachment points, and cutting a small piece from there gives a patch with a near-perfect grain and color match, something no dye kit can fully replicate.
Needle-and-thread stitching works for seam splits specifically, where the tear runs along an existing seam line rather than through open leather. A curved upholstery needle and heavy-duty thread, worked in a tight zigzag across both edges, can hold a seam together for years. It’s slower than a kit repair, but it’s genuinely durable when done on the right kind of tear.
DIY vs Professional Repair: At a Glance
| Method | Best For | Time Needed | Typical Cost | Durability |
|---|---|---|---|---|
| DIY Repair Kit | Tears under 3 inches | 1–3 hrs plus dry time | $20–$60 in materials | 1–3 years |
| Emergency Patch (no kit) | Temporary fix | 15–30 minutes | $5–$15 | Weeks to months |
| Needle & Thread | Seam splits only | 30–60 minutes | Under $10 | 3+ years if done right |
| Professional Repair | Visible or larger tears | Usually same day | $150–$300+ per seat | 3–5+ years |
| Full Reupholstery | Structural or multiple tears | 1–3 days | $400 and up per seat | 5–10+ years |
The pattern is straightforward. Hidden, low-visibility tears rarely justify professional cost. Tears on the most visible part of the seat, especially in a newer or higher-value vehicle, usually earn back the extra spend through a cleaner, longer-lasting finish.
Mistakes That Make a Small Rip Worse
Ignoring it for “just a little longer.” A one-inch tear left alone doesn’t stay one inch. Every sit-down stretches the surrounding leather a bit more, and small tears can double in size within a matter of weeks.
Taping over it. Duct tape or packing tape might seem like a quick fix, but the adhesive residue damages the leather further, and removing the tape often takes a chunk of the surrounding material with it.
Applying filler in one thick layer. This is the single most common DIY mistake. Thick filler cracks as it cures, undoing the entire repair within days.
Skipping the cleaning step. Oils, lotions, and everyday grime sit in the leather’s pores. Filler applied over that residue peels loose far sooner than one applied to a properly cleaned surface.
What the Research Shows
Repair professionals and DIY forums consistently point to the same pattern: tears caught within the first few weeks cost a fraction of what a neglected one eventually runs. A repair job quoted around $265 by a local upholstery shop, cited in one automotive forum thread, reflects the typical mid-range price for a single seat bottom, sitting comfortably within the broader $75–$300 range reported across DIY and professional sources alike.
The pattern holds across vehicle types too. Rideshare and delivery drivers, who log far more entries and exits per day than the average commuter, report bolster tears far more often than any other type of leather damage, which lines up with where seatbelt buckles and pant pockets make repeated contact.
Should You Fix It Yourself Before Selling or Returning a Lease?
This part rarely gets mentioned anywhere else. If the car is leased or headed toward a trade-in, a visible DIY patch can actually work against you at inspection, since assessors are trained to spot mismatched color or texture and may flag it as unrepaired damage regardless of the fix underneath. A professional, factory-matched repair tends to pass inspection cleanly, while a hidden bolster tear on the far side of the seat is usually safe to handle yourself either way. Anyone planning to sell privately faces less scrutiny, but a rough-looking DIY patch still shows up in listing photos and can knock down the asking price more than the repair itself would have cost.
How to Prevent Future Rips
- Keep sharp objects, especially keys and multitools, out of back pockets while driving
- Use a UV-protectant leather conditioner every few months to keep the material supple
- Install seat covers on high-wear seats, particularly the driver’s side
- Address small cracks the moment they appear, before they open into full tears
- Avoid parking in direct sun for extended periods when possible
A Note for Different Seat Types
Not every leather seat behaves the same way. Nappa leather, common in higher-end trims, is softer and thinner than standard automotive hide, so it needs a more flexible filler that won’t create a stiff ridge once it cures. Bonded leather and leather-look vinyl, found in many mid-range vehicles, actually repair more easily than genuine hide because the surface layer is more uniform. Anyone unsure which type they’re working with can run the pinch-and-smell check covered earlier, since using the wrong filler consistency is a common reason DIY repairs fail on premium interiors.
Conclusion
Knowing how to fix ripped leather car seat damage saves real money and keeps a car’s interior looking cared for instead of neglected. Whether the fix involves a full repair kit, a quick patch, a hidden scrap of factory leather, or a trip to a local specialist, catching the tear early and working through the process methodically makes all the difference between a repair that lasts and one that needs redoing in a month.
FAQs
Can a ripped leather car seat be fixed permanently, or does it always come back?
A properly layered repair, done with clean prep and thin filler coats, can last for years. Repairs that fail early almost always trace back to skipped cleaning steps or filler applied too thick.
How much does it cost to fix a ripped leather car seat myself?
Most DIY repair kits cost between $20 and $60, and a full repair including all materials typically lands in the $75–$300 range depending on tear size.
Is it safe to use a heat gun on a heated leather seat?
Not directly on the wires. Check for a heating element under the surface first, and use a hair dryer on low heat instead of a heat gun to avoid damaging the grid.
Is it better to patch a leather seat or replace it entirely?
Patching makes sense for tears under three inches. Larger tears, structural damage, or seats with multiple failure points are usually better served by reupholstery.
How long should I wait before sitting on a repaired leather car seat?
At least 24 hours after the final sealant coat. Sitting too soon before the repair fully cures is one of the fastest ways to undo the work.