
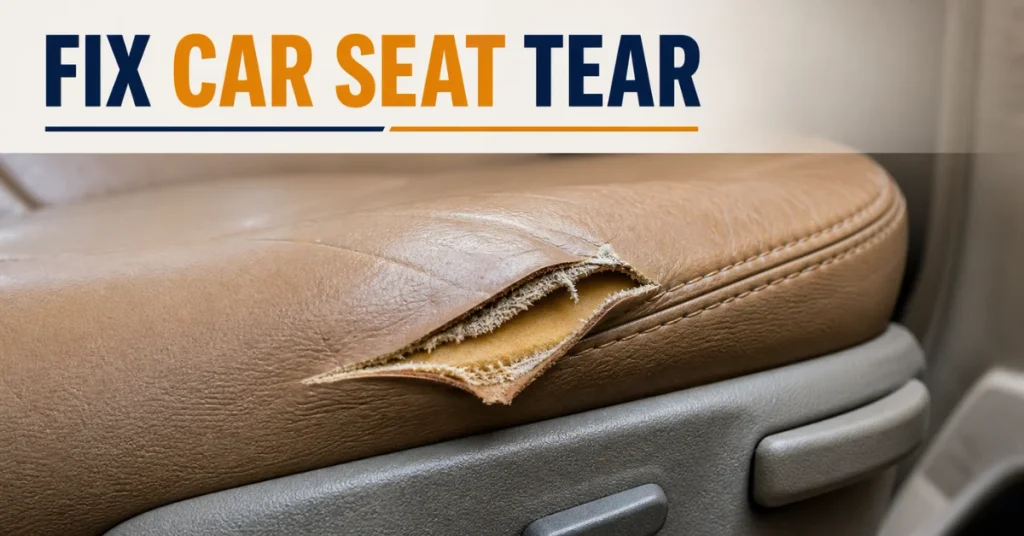
A ripped seat can make a perfectly good car feel ten years older than it is. If you’ve been putting off the repair because it seems like a job for a body shop, here’s some good news: how to fix tear in car seat damage is a weekend task most people can handle with a $20 kit and a free afternoon. The trick is matching the fix to the material you’re actually working with, and knowing when a patch job just won’t cut it.
How to Fix Tear in Car Seat: Start With an Honest Damage Check
Before buying anything, get down on your knees and really look at the tear. Size, depth, and location change everything about the repair.
A small split along a seam is a different animal than a gash that’s exposed the foam padding underneath. Seam separations usually just need re-stitching. A puncture through the surface material calls for a patch and filler. And if the tear runs along a stitched edge near the outer bolster of a front seat, stop and check your owner’s manual first — side airbags right behind that panel, and cutting into the wrong spot can interfere with how the system deploys in a crash. The National Highway Traffic Safety Administration notes that side airbags inflate even faster than frontal ones because there’s so little room between the occupant and the point of impact, which is exactly why that area deserves extra caution before you start cutting or gluing anything.
Once you know what you’re dealing with, sort the damage into one of three buckets: small (under two inches, edges intact), medium (two to six inches, may need sewing), or large (six-plus inches or missing material). This sizing decides which products you’ll need and whether DIY is even the right call.
What You’ll Need Before You Start
Gathering the right supplies up front saves a lot of frustration halfway through.
- A repair kit matched to your seat material (leather, vinyl, or fabric)
- Rubbing alcohol and a lint-free cloth for cleaning
- Sharp scissors or a utility knife for trimming frayed edges
- A curved upholstery needle and heavy-duty thread, if sewing
- A heat source such as a hair dryer or the tool that comes with most kits
- Fine-grit sandpaper for smoothing filler
Most all-in-one kits run somewhere between fifteen and forty dollars and include backing fabric, adhesive, and color-matching compound. That’s a fraction of what a body shop charges, and it’s the main reason so many drivers try this route first.
Here’s a quick side-by-side so you know what you’re getting into before you commit to a material-specific kit:
| Material | Difficulty | Repair Time | Typical Kit Cost | Professional Cost | Expected Durability |
|---|---|---|---|---|---|
| Fabric | Easy | 20–40 minutes | $10–$20 | $100–$200 | 3–5 years |
| Vinyl | Moderate | 1–3 hours plus curing | $15–$30 | $150–$250 | 5–7 years |
| Leather | Moderate to hard | 2.5–4 hours plus 7–9 hours cure | $20–$40 | $150–$300 | 5–7 years |
Fabric wins on speed and forgiveness. Leather takes the most patience but holds up the longest once it’s done right.
How to Fix Tear in Car Seat Made From Leather or Vinyl
Leather and vinyl respond to almost identical repair techniques, since both are essentially a colored skin over a flexible backing.
Before applying anything, warm the leather or vinyl in direct sunlight or with a hair dryer on low heat for a few minutes. This makes the material pliable so the patch settles into natural creases instead of sitting stiff on top. A quick tape test confirms readiness: press a strip of masking tape onto a clean, dry section and peel it back. If any residue transfers, clean the area again before starting.
Once the surface is warm and clean, trim away any loose or frayed threads so you’re working with a clean edge. Slide a small piece of the backing fabric from your kit underneath the tear, apply the adhesive, and press the original material down onto it. Once that’s set, mix the color-matched filler and apply it in thin layers, letting each coat cure before adding the next.
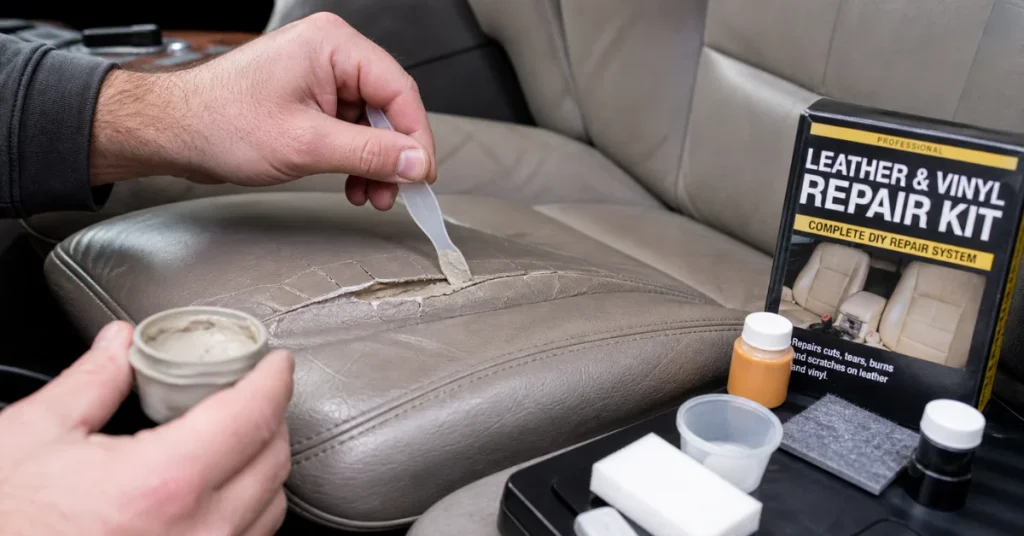
The last stage is the one that separates an amateur patch from a repair nobody notices: texture matching. Most kits include grain paper you press onto the wet filler and heat briefly, which recreates the pebbled or smooth finish of the surrounding leather. Skip this step and the repair will look like a smear of plastic sitting on top of real leather, no matter how close the color is.
Anyone who’s worked through a kit like this once will tell you the color-matching step is genuinely the hardest part. Beige and tan tones are notoriously tricky because factory leather fades unevenly with sun exposure, so a “perfect” bottle match on day one can still look slightly off against a seat that’s spent years in direct sunlight.
Fixing a Torn Fabric Seat
Cloth upholstery behaves nothing like leather, and honestly, it’s usually the easier of the two to repair well.
For a clean rip where no fabric is missing, threading a curved needle and closing the gap with a simple whipstitch often does the job in under twenty minutes. Pull the thread snug but not so tight that it puckers the surrounding fabric, then knot it off and seal the stitches with a dab of liquid seam sealant to stop future fraying.
If material is actually missing, you’ll need a patch. Look for a scrap of matching fabric hiding under the seat itself, since manufacturers often leave a small reserve there for exactly this situation. Iron-on adhesive backing bonds the patch from underneath, and a few careful stitches around the visible edge finish the job so it holds up to daily use.
When to Call a Professional Instead
Not every tear belongs in the DIY column, and there’s no shame in recognizing when a job has outgrown a home repair kit.
Large tears, damage that’s spread across multiple panels, or rips near stitched seams with hidden hardware are usually worth handing to a pro. Full seat reupholstering typically runs into the hundreds of dollars, but a targeted professional patch on leather often lands in a more modest range, and it comes with a finish that’s genuinely hard to replicate at home.
Seats with built-in heating or ventilation need one more check before any cutting or sanding. Those systems run thin wiring just beneath the surface material, and going too deep can damage the element itself. On a heated or ventilated seat, keep trimming shallow and stick to surface-level filler rather than working into the padding. And if your seats have memory settings or occupant sensors built into the cushion, that’s another strong signal to bring in someone who works on this material every day rather than risk damaging wiring you can’t see.
There’s also a simple cost-benefit read here. If your car is older and you’re planning to sell it soon, a tidy DIY patch that contains the damage is usually the smarter spend. If it’s a newer vehicle you intend to keep for years, paying once for a professional-grade repair often works out cheaper than redoing a home fix that doesn’t hold up.
What the Research Shows
Detailed looks at consumer upholstery repair consistently point to one pattern: material type predicts outcome more reliably than the specific product used.
Fabric repairs, done with basic sewing skills, tend to blend in almost invisibly because thread and weave are forgiving of small imperfections. Leather and vinyl repairs, on the other hand, succeed or fail almost entirely on color and texture matching, which is why so many DIY attempts on leather end up visible even when the structural repair itself is solid. Anyone who has handled several of these repairs over time will say the same thing: patience during the drying and layering stages matters more than any single product choice.
Common Mistakes That Ruin the Repair
A few missteps show up again and again in failed at-home fixes.
Rushing the cure time is the biggest one. Filler and adhesive that look dry on the surface can still be soft underneath, and sitting on the seat too soon will crack a repair that would otherwise have held for years. Skipping the cleaning step is another: oil and dirt trapped under a patch stop adhesive from bonding properly, no matter how good the product is. And using a generic all-purpose glue instead of a proper leather or vinyl adhesive almost always leads to peeling within weeks.
The Bottom Line
Knowing how to fix tear in car seat damage puts a real option on the table before you spend money on covers or a shop visit. Small to medium tears in fabric, leather, or vinyl are genuinely within reach of a careful first-timer with the right kit, some patience through the drying stages, and a bit of caution around any panel that sits near a side airbag or heating element. Bigger damage, or anything involving built-in electronics, is where handing the keys to a specialist starts to make more financial sense than gambling on a DIY attempt.
FAQs
Can I fix a car seat tear without buying a repair kit?
Small fabric tears can be closed with a needle and thread you already own, but leather and vinyl really do need a color-matched filler kit to look right, since generic glue won’t recreate the surface texture.
How long does a DIY car seat tear repair actually last?
A properly done leather or vinyl patch typically holds for five to seven years under normal use, while a fabric repair tends to hold three to five years, depending on how much daily friction that spot sees.
Is it safe to repair a tear near a side airbag panel?
Treat any tear near the outer bolster of a front seat with caution, and check your owner’s manual first, since some seats house airbag components directly behind that stitching.
Will a repaired seat pass a used car inspection or resale check?
A neat, well-blended repair generally isn’t flagged in standard used car inspections, though buyers doing a close visual check may still notice a leather patch under bright light.
What’s cheaper, a DIY kit or a professional upholstery repair?
A basic repair kit costs a small fraction of a professional job, but if the color match fails or the tear is large, a redo can eat up those savings fast, so it’s worth being realistic about the size of the damage before choosing.