
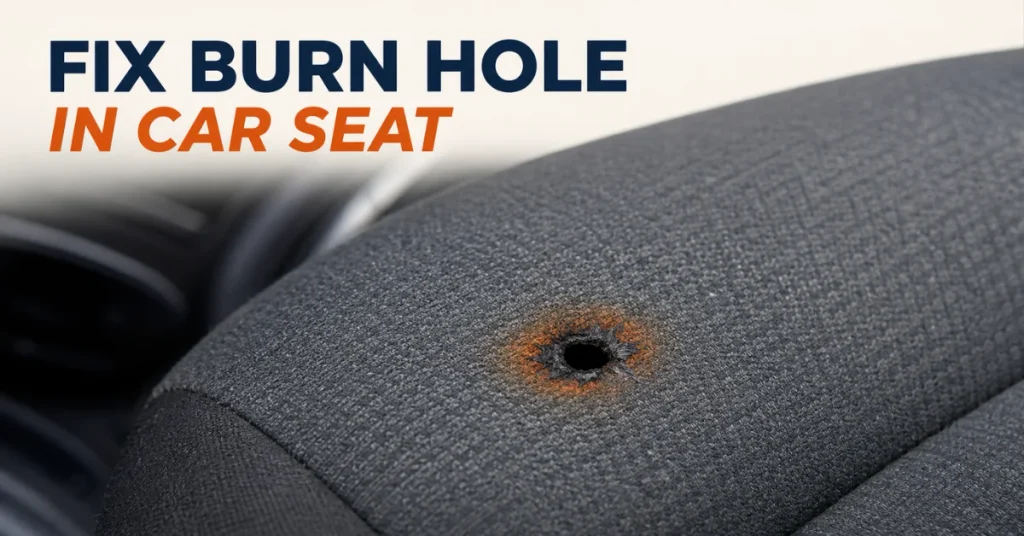
A dropped cigarette, a stray ember from a bonfire trip, or a phone charger that got too hot under a seat cover. That’s usually all it takes. One second the seat looks fine, the next there’s a scorched little crater staring back at you every time you open the car door. If you’ve been searching for how to fix burn hole in car seat damage, you’re not dealing with something rare — it’s one of the most common interior repairs mechanics and detailers get asked about, and the good news is that most burns are fixable without replacing the whole seat.
This guide walks through what actually works, what to skip, the exact material you’re dealing with, and when a repair kit just won’t cut it.
Why a Burn Hole in Your Car Seat Isn’t Just a Cosmetic Problem
It’s tempting to think of a burn mark as purely an eyesore. It isn’t only that.
Anyone who’s dealt with a stray ember on upholstery knows the damage spreads if it’s ignored. Exposed foam absorbs moisture and odor. Frayed fabric edges catch on clothing and widen the hole with every use. And if the burn sits near a seatbelt anchor point, that’s a structural concern, not a cosmetic one, so that specific spot should go to a professional, full stop.
There’s also a resale angle. A car with a visible burn hole reads as neglected to a buyer, even if the mechanicals are perfect. Interior condition drags down valuation more than most sellers expect.
Vehicle interiors are also regulated for fire safety. Under Federal Motor Vehicle Safety Standard 302, materials used in the occupant compartment must not burn faster than 102 mm per minute across a standardized test sample, a rule meant to give occupants time to get out in the event of a fire. That’s not a rule about home repairs, but it explains why manufacturers use flame-resistant fabrics in the first place, and why a burn hole matters beyond looks.
How to Fix Burn Hole in Car Seat: Assessing the Damage First
Before reaching for any glue or patch kit, figure out exactly what you’re working with.
Check three things:
- Material type. Cloth, vinyl, genuine leather, and synthetic leather (pleather) all need different repair approaches. Mixing them up wastes product and time.
- Depth. A surface scorch that hasn’t melted through is a much easier fix than a hole that goes all the way to the foam underneath.
- Size. Small burns under half an inch across are realistic DIY jobs. Larger or irregular burns usually need a patch, not just filler.
Clean the area with a mild detergent and let it dry fully before doing anything else. Trying to glue or patch a damp surface is a guaranteed way to end up redoing the whole job a week later.
Here’s a quick way to match your seat material to the right fix before you buy anything:
| Seat Material | How to Identify | Best Repair Method | Tools Needed | Difficulty |
|---|---|---|---|---|
| Cloth / Fabric | Soft, woven texture, visible threads | Fuzz-and-glue or reweave | Fabric glue, scissors, tweezers | Easy |
| Vinyl | Smooth, slightly glossy, no natural grain | Liquid vinyl compound + heat-set | Vinyl repair kit, iron, sandpaper | Moderate |
| Genuine Leather | Natural grain, texture varies slightly across the hide, warm to the touch | Filler layering + color matching | Leather filler, scalpel, color compound | Hard |
| Synthetic Leather (Pleather) | Uniform repeating pattern, cooler and more plasticky to the touch | Vinyl-style patch, not leather filler | Vinyl repair kit | Moderate |
That last row matters more than most guides let on. Pleather and genuine leather get treated as the same material in a lot of repair advice, and they aren’t. Leather filler doesn’t bond well to pleather’s polyurethane surface, and it tends to crack once it’s flexed a few times. A vinyl-style liquid patch holds far better on synthetic leather, even though the seat looks and feels like real leather to the average buyer.
Fixing Fabric and Cloth Seats: The Reweave and Patch Method
Cloth seats are, in a strange way, the most forgiving material to repair, mainly because the fix is almost invisible when done right.
Here’s a typical breakdown of how a cloth burn gets handled:
- Trim away any charred or melted fibers with small, sharp scissors. Don’t touch anything undamaged.
- Scrape a small amount of matching fabric fuzz from a hidden spot, like underneath the seat or the seat’s edge.
- Apply a small amount of fabric glue into the hole.
- Press the collected fuzz into the glue, building it up slightly above the surrounding surface.
- Let it cure fully, then trim any fibers standing too high.
For seats with a woven pattern, some owners prefer reweaving instead, trimming damaged threads and stitching a similar thread through the gap, knotting it off underneath. It takes more patience but leaves a nearly seamless finish on older, tightly woven fabrics.
One detail that gets skipped in a lot of repair guides: humidity slows everything down. In a humid climate, give fabric glue and filler noticeably longer to cure than the kit instructions suggest, sometimes double. Touching or trimming a repair before it’s fully set is one of the most common reasons a fresh patch pulls loose within days.
Fixing Vinyl and Leather Seats: What Actually Works
Vinyl and leather behave nothing like cloth, so trying a fabric-glue fix on either one usually ends badly.
For vinyl, a liquid repair compound from a vinyl repair kit is the standard approach. The compound is applied into the hole, layered thin, and heat-set with a household iron on low, using a cloth barrier so the iron never touches the vinyl directly. Sandpaper smooths the final surface before a color-matching top coat blends it in.
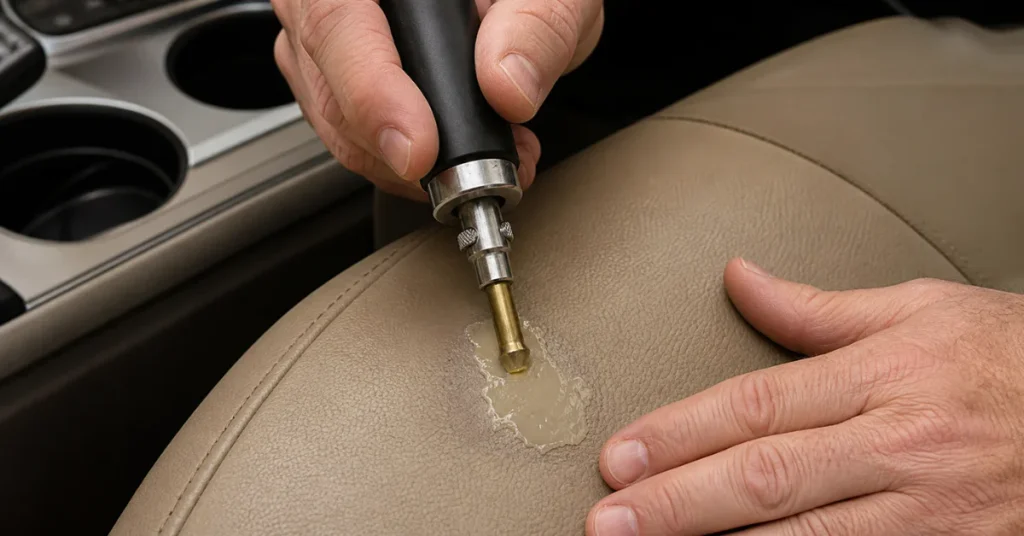
For genuine leather, the process starts with trimming the burn out with a scalpel or sharp blade, cutting only about halfway through the material’s depth if the burn hasn’t fully penetrated. If it has gone all the way through, a canvas backing gets tucked behind the hole first, using tweezers to keep it flat, then filler is built up in thin layers and dried between coats to avoid shrinkage. Color compound goes on last, sponged in gradually until it matches the surrounding grain.
For pleather, skip the leather filler kit entirely. Treat it like vinyl: trim the damaged area, apply a vinyl compound, and heat-set it the same way. Owners who use leather-specific filler on synthetic leather often end up redoing the repair within a few months once the filler cracks along the flex lines.
Leather repairs genuinely reward patience. Rushing the filler stage is the single biggest reason DIY leather fixes look patchy instead of blended.
Dealing With Lingering Smoke or Burn Odor
A repaired hole doesn’t always mean a repaired smell. Ash and melted synthetic fibers can leave an odor that lingers well after the visible damage is fixed.
For most cases, thorough seat shampooing paired with an enzyme-based odor eliminator handles it. Open the windows and run the car’s ventilation on fresh air, not recirculate, for a few days afterward to help clear trapped smoke particles from the cabin air. If the smell persists after cleaning, a professional ozone treatment at a detail shop breaks down odor molecules more thoroughly than any spray product can, though it’s worth doing only after the physical repair is finished.
Repair Kits vs. Professional Upholstery: Which One Actually Wins
Here’s the honest trade-off. A repair kit costs a fraction of a shop visit and works well for small, shallow burns on any material. But once a burn is larger than roughly a quarter-inch across, or it’s sitting somewhere highly visible like the driver’s seat bolster, a kit tends to leave a repair that’s noticeably better than the burn but still noticeably a repair.
Professional upholsterers can swap out an entire panel with matching material, which is the only route that gets close to a factory finish. It costs more, sometimes a fair amount more, but for a vintage car or a lease return, that difference in cost can be worth it. Lease agreements typically flag interior burn damage during the return inspection as excess wear, which can turn into a charge well above what a kit or even a professional patch would have cost upfront.
Think of it like touching up a scratch on a wall versus repainting the whole room. One’s a quick save, the other’s a proper fix, and the right call depends on how much the flaw actually bothers you and who’s going to see it next.
What the Research Shows
Detailed analysis of automotive interior standards reveals something most drivers never think about: the materials in your seats aren’t random fabric choices. They’re engineered specifically to resist rapid flame spread, which is why household glue substitutes and non-automotive adhesives often fail to bond properly or degrade faster under heat and sun exposure inside a parked car.
Industry professionals working in auto detailing consistently point to two failure patterns in DIY repairs: rushing the curing time on adhesives, and skipping the trim step, which leaves loose charred fibers under the patch that eventually work their way back to the surface. Skipping either step is the fastest way to redo the same repair twice.
How to Fix Burn Hole in Car Seat Without Making It Worse
A few mistakes come up again and again, regardless of seat material:
- Using household super glue as a permanent fix. It bonds fast but goes brittle and yellows under UV exposure through a windshield.
- Skipping the trim step. Leftover charred fiber prevents proper adhesion no matter what glue or filler goes on top.
- Rushing the cure time. Most kits need longer drying windows than people expect, especially in humid climates.
- Treating pleather like real leather. Leather filler cracks on synthetic material far sooner than a vinyl-style patch would.
- Ignoring seatbelt-adjacent burns. Any damage near a belt anchor or airbag trim panel needs a professional look, not a home fix.
Handled carefully, though, most burns come out looking dramatically better than they started, and a repair that costs the price of a small kit beats a bill that starts in the hundreds of dollars and climbs from there for a full reupholster.
How to Prevent Future Burn Holes
Fixing the current burn is only half the job if the same habit caused it in the first place.
A few practical changes cut the risk considerably. Move ashtrays and lighters away from seat edges, since ash tends to fall exactly where a hand naturally rests. Avoid propping a phone charger or power bank directly on the seat fabric during long charging sessions, since some can run hot enough to scorch fabric over time. If anyone in the car smokes, a portable ashtray with a lid contains embers far better than an open cup holder tray.
For families with kids, keeping curling irons, hair straighteners, or portable heaters away from back seats during transport avoids a surprisingly common source of accidental burns. None of this eliminates risk completely, but it meaningfully lowers how often this repair needs doing again.
Conclusion
Knowing how to fix burn hole in car seat damage comes down to identifying the material first, cleaning and trimming the area properly, and matching the repair method to the seat type instead of using one universal fix for everything. Cloth, vinyl, genuine leather, and pleather each need a slightly different approach, and rushing any of the steps is what separates an invisible repair from an obvious patch job. For small, shallow burns, a repair kit and a bit of patience will usually do the trick. For anything larger, structurally sensitive, or on a car you plan to sell or return soon, a professional upholsterer remains the safer bet.
FAQs
Can I really fix a burn hole in my car seat myself?
Yes, for most small to medium burns on cloth, vinyl, leather, or pleather, provided the damage doesn’t reach a seatbelt or safety component.
What’s the cheapest way to fix a burn hole?
An automotive fabric or vinyl repair kit is the most budget-friendly option, typically far less expensive than a shop visit for minor damage.
Will a repaired burn hole be completely invisible?
Small, shallow burns can come very close to invisible when repaired carefully. Larger burns usually leave a slight texture difference up close, even after a good repair.
Does household glue work for car seat burns?
It can hold in the short term but tends to yellow and become brittle with heat and UV exposure, so a dedicated fabric or vinyl adhesive lasts longer.
When should I skip the DIY route entirely?
If the burn is near a seatbelt anchor, spans multiple seat panels, or you’re preparing the car for resale or a lease return, a professional upholsterer is the safer call.