
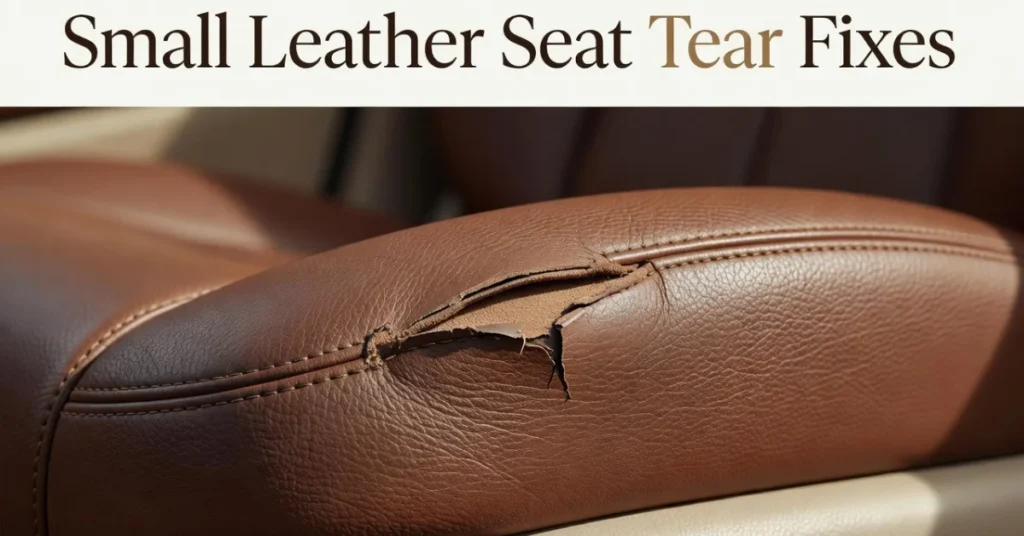
You spot a thin crack along the bolster, or a claw mark from the dog, and your stomach drops a little. Here’s the good news: most small damage doesn’t need a shop visit at all. Learning how to fix leather car seats yourself is a real, achievable weekend project, not a specialty skill locked behind a trade certificate.
The trick is matching the fix to the damage. A hairline crack, a shallow scuff, and a two-inch rip all call for different tools, and grabbing the wrong kit is the number one reason DIY repairs fall apart within a few months.
Before touching anything, run a finger over the spot. Does it feel dry and brittle, or is there an actual gap where stuffing peeks through? That single check decides everything that comes next.
Quick Reference: Match Your Damage to the Right Fix
Skimming a full guide when you just want to know “what do I actually need” gets old fast. Here’s the shortcut:
| Damage Type | Best Fix Method | DIY Difficulty |
|---|---|---|
| Hairline crack, no gap | Conditioning only | Easy |
| Small clean tear (under 1 inch) | Filler and backing fabric | Easy–Medium |
| Tear on a bolster or crease | Patch and backing, not filler alone | Medium |
| Peeling or delamination | Repair compound before conditioning | Hard |
| Seam split along stitching | Sewing, usually professional | Hard |
Find your row, then jump to the matching section below.
Identify Your Leather Type Before You Buy Anything
This step gets skipped constantly, and it’s the reason a lot of DIY jobs go wrong before they even start.
Pigmented, finished leather has a protective coating and handles cleaners and dyes fairly well. Aniline leather, sometimes called unfinished or naked leather, soaks up whatever touches it, including isopropyl alcohol and off-the-shelf dyes not made for it. Use the wrong product on aniline leather and you can end up with a permanent blotch that’s worse than the original tear.
A quick way to check: press a damp finger on a hidden spot, like the underside of the seat. If it darkens noticeably, you’re likely dealing with aniline leather, and it’s worth calling a dealership or upholstery shop before buying supplies. Most factory car seats are pigmented, but higher trims on some luxury models use aniline or semi-aniline hides. It’s also worth noting that many modern vehicles now use synthetic leather substitutes instead of genuine hide, and these generally respond well to standard repair kits without the same staining risk.
What You’ll Need Before You Start
A rushed repair almost always looks rushed. Gathering the right supplies first saves a second trip and a second mess.
Here’s a working list:
- A mild leather cleaner and a soft cloth
- Isopropyl alcohol for prepping the surface, skipped entirely on aniline leather
- A backing fabric or scrim to sit behind larger tears
- A flexible leather filler, not a rigid epoxy
- Color-matched dye or pigment
- A grain texture sheet to mimic the seat’s natural pattern
- A leather conditioner for the final step
Skip anything labeled as a general “super glue.” It dries stiff, and stiff patches crack the moment someone sits down. Flexibility is the whole game with car leather, since seats flex constantly with body weight and temperature swings, which is exactly why proper automotive upholstery work relies on flexible materials rather than rigid ones.
How to Fix Leather Car Seats With a Repair Kit, Step by Step
For small to medium tears, a repair kit gets you most of the way there. Anyone who has handled one of these kits knows the process rewards patience more than skill.
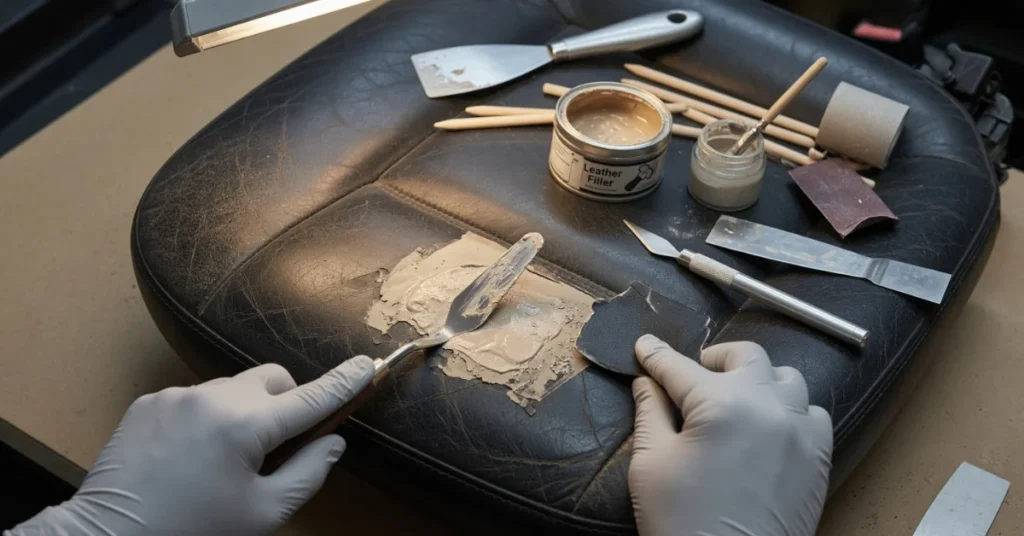
1. Clean thoroughly. Wipe the area with a rag and warm, soapy water, then let it dry completely. Any grime left behind will stop the filler from bonding.
2. Trim loose threads. Snip any curled edges around the tear so the repair sits flat instead of lumpy.
3. Insert the backing. Slide the scrim or backing fabric under the tear with a palette knife or tweezers, then glue it in place. This gives the filler something to grip, the same way a cast supports a break while it heals.
4. Build up the filler. Apply thin layers, letting each one dry before adding the next. Rushing this step is the most common reason fillers crack later.
5. Sand lightly. Once the filler sits flush with the surrounding leather, a fine sanding pad smooths it out without tearing the surrounding material.
6. Patch test the dye first. Before touching the repaired spot, dab the colorant on a hidden area, like the seat’s underside or back panel, and let it dry. Colors shift once dry, and this single check prevents most of the mismatched patches you see on forums.
7. Dye and seal. Layer the colorant until it matches, then finish with a sealant so the color doesn’t rub off on clothing.
Anyone learning how to fix leather car seats for the first time should expect this whole process to take a couple of hours, spread across drying times rather than one continuous sitting.
When a Patch or Backing Material Makes More Sense
Not every rip suits a filler-only approach. If the tear runs longer than two inches, sits on a crease that bends constantly, like the bolster, or has ragged, stretched edges, filler alone tends to fail within weeks.
In that case, a patch placed underneath the leather, glued flat, and pulled taut on both sides holds up far better. Mobile leather technicians see the opposite approach fail every week: a thick layer of filler slapped over a big gap, looking fine on day one and splitting again by month two.
Think of it like patching drywall versus patching a stretched sweater. One holds a shape; the other needs support from behind or it just tears wider.
How to Fix Leather Car Seats With Deeper Cracks or Sun Damage
Cracking and fading are a different animal from a clean rip. This damage usually comes from years of UV exposure drying out the natural oils in the hide.
If the leather still feels intact, without any actual gap, conditioning alone can restore a surprising amount of flexibility and color depth. Fine surface cracking often responds well to a few rounds of a quality conditioner worked in over several days.
Once the surface starts peeling, though, conditioning won’t reverse it. That’s delamination, where a synthetic coating separates from the base material, and it needs a repair compound applied before conditioning does any good.
Drivers who park in direct sun for years, especially in hot climates, see this far more often on the driver’s seat bolster than anywhere else. That’s simply the panel taking the most heat and the most friction from getting in and out.
Heated and Ventilated Seats: What to Watch For
Newer vehicles often hide heating elements or ventilation mesh just under the leather surface, and this changes how you should approach a repair.
Avoid pressing sharp tools or an emery board hard into the area, since a torn heating element usually means a much bigger repair bill than the leather itself. If you’re using a heat gun to cure filler, keep it moving and avoid holding it over one spot for long stretches. A quick check with your vehicle’s owner manual will confirm whether the seat you’re working on has these components before you start cutting or sanding.
Cure Time Changes With the Weather
Most kits list a standard drying time, but that number assumes a warm, dry room. Humidity slows everything down, and cold garages do the same.
In damp or cold conditions, double the suggested cure time between layers, and avoid working outdoors on a humid day if you can help it. Filler that looks dry on the surface but hasn’t cured underneath is a common reason repairs dent or smear the first time someone sits down. If you’re working in a garage without climate control, a small space heater aimed nearby, kept a safe distance from any adhesives, can speed things along.
One Thing Nobody Mentions: The Smell
Fresh filler and dye carry a noticeable chemical smell for a few days after the repair, especially in a closed car sitting in the sun. It fades on its own, but cracking a window for the first day or two speeds up the process and keeps the cabin comfortable in the meantime. This isn’t a sign anything went wrong. It’s just the sealant finishing its cure.
DIY vs. Professional Repair: What the Cost Difference Actually Buys
A basic DIY kit costs a fraction of what a shop charges, and for small, clean tears that’s often money well spent. But cost isn’t the only variable worth weighing.
| DIY Repair | Professional Repair | |
|---|---|---|
| Typical spend | Low, one-time kit cost | Higher, but includes labor and color matching |
| Best for | Small tears, light cracking | Large tears, split seams, color-critical matches |
| Time | A few hours across drying cycles | Often same-day or next-day |
| Risk | Color mismatch, filler cracking if rushed | Minimal, backed by a warranty in most cases |
Independent auto upholstery shops generally charge more for large or deep damage, particularly when exact color matching is involved, while smaller cosmetic repairs sit at the lower end of most shop price lists. If you’re dealing with a lease return or a high-value vehicle where resale matters, a professional job is usually worth the extra spend.
What the Research Shows
Detailed analysis of failed DIY attempts points to one repeat cause: skipping the backing material on anything bigger than a pinhole. Technicians who see these jobs regularly report that unsupported filler is the single biggest reason repairs need redoing.
Interest in home leather restoration has grown steadily as more drivers try to stretch the life of aging interiors rather than replace seats outright. Professionals working in mobile leather repair consistently note that early intervention, catching a small crack before it spreads, saves owners real money compared to waiting until the damage reaches the padding underneath.
The pattern that shows up again and again is simple: the sooner you learn how to fix leather car seats and act on it, the smaller and cheaper the fix stays.
Common Mistakes That Ruin a Leather Repair
A few habits sink otherwise decent repair attempts:
- Skipping the cleaning step and trapping dirt under the filler
- Using a rigid epoxy that cracks the first time the seat flexes
- Applying dye in one thick coat instead of several thin ones
- Sitting on the repair before it’s fully cured
- Ignoring the grain texture, leaving a smooth, obviously patched spot
- Working over a heating or ventilation element without checking first
Avoiding these six mistakes closes most of the gap between a DIY job and a shop-quality result.
Who Should Skip DIY Entirely
Some jobs genuinely call for a professional. Aniline or unfinished leather reacts unpredictably to alcohol-based cleaners and off-the-shelf dyes, so a wrong product choice can stain the whole panel. Large seam splits that run into the seat’s stitching also need an upholsterer’s sewing machine, not glue.
If you’re not confident identifying your leather type, a quick call to a dealership or an upholstery shop before buying supplies can save a ruined seat.
Conclusion
Knowing how to fix leather car seats turns a stressful discovery into a manageable Saturday task. Small tears, light cracking, and faded panels are almost always within reach of a careful DIYer with the right kit, the right leather type identified, and enough patience for proper cure times. Bigger splits, unusual leather types, heating elements, and anything involving the seat’s stitching are better left to a professional who repairs interiors for a living. Either way, catching damage early is what keeps the repair small, affordable, and nearly invisible once it’s done.
FAQs
Can you really fix leather car seats yourself, or is it better to always go professional?
Small to medium tears and light cracking are genuinely DIY-friendly with the right kit. Large seam splits, aniline leather, or anything needing an exact factory color match usually turns out better in professional hands.
How long does a leather car seat repair last?
A properly layered repair, with backing material and flexible filler, typically holds up for years of normal use. Rushed jobs that skip the backing tend to crack again within a few months.
What’s the difference between fixing a tear and fixing cracked leather?
A tear needs a physical patch or filler to close a gap. Cracked leather is usually a dryness issue and often responds to conditioning alone, unless the surface coating has already started peeling.
Do leather repair kits work on vinyl or synthetic seats too?
Most kits work across leather, vinyl, and synthetic leather substitutes, since the filler and dye bond similarly. Always check the kit’s label for your specific material type first.
Is it safe to sit on a leather seat right after a repair?
No. Give the filler, dye, and sealant the full cure time listed on the product, usually a few hours to overnight and longer in cold or humid conditions, or the repair can smear or dent under weight.